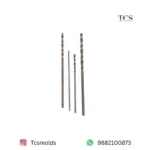
DILLL BIT SET OF 4
January 30, 2024
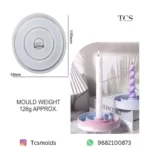
RING CANDLE HOLDER
January 30, 2024Using a hand drill for resin art can add intricate details, create textures, and enable you to embed objects within the resin. Here’s how you can use a hand drill for resin art:
### Materials Needed:
1. **Resin**: Epoxy resin suitable for art purposes.
2. **Hardener**: Corresponding hardener for the resin.
3. **Mixing Cups and Stir Sticks**: To mix the resin and hardener.
4. **Pigments or Dyes**: Optional, for coloring the resin.
5. **Objects or Inclusions**: Items to embed within the resin, such as dried flowers, beads, or small stones.
6. **Hand Drill**: A hand drill with various drill bit sizes.
7. **Safety Gear**: Gloves, safety goggles, and a respirator mask to protect against resin fumes.
### Steps:
1. **Prepare Your Work Area**: Ensure you have a clean and flat surface to work on. Protect your workspace with a disposable covering or a silicone mat.
2. **Prepare the Resin**: Follow the manufacturer’s instructions to mix the resin and hardener thoroughly in the recommended ratio. Add any desired pigments or dyes during the mixing process.
3. **Pour the Resin**: Pour a layer of mixed resin onto your desired surface. Spread it evenly using a spatula or brush.
4. **Embed Objects (Optional)**: Arrange your chosen objects or inclusions within the resin layer. Make sure they are fully submerged and positioned as desired.
5. **Drill Holes**: Using the hand drill, carefully drill holes into the resin surface. You can create patterns, textures, or simply add visual interest by drilling holes of varying sizes and depths. Be mindful of the speed and pressure applied to avoid cracking or damaging the resin.
6. **Clean Up Excess Resin**: After drilling, clean up any excess resin around the holes or on the surface using a clean brush or cloth.
7. **Allow to Cure**: Allow the resin to cure according to the manufacturer’s instructions. This typically involves letting it sit undisturbed for several hours to overnight, depending on the resin type and environmental conditions.
8. **Safety Precautions**: Always wear appropriate safety gear when working with resin and a hand drill. Ensure good ventilation in your workspace to minimize exposure to resin fumes.
9. **Finishing Touches**: Once the resin has fully cured, you can sand the surface lightly to smooth out any rough edges around the drilled holes. Wipe the surface clean with a damp cloth afterward.
10. **Sealing (Optional)**: If desired, you can apply a clear sealant or resin topcoat to enhance the appearance and durability of your resin art piece.
By following these steps, you can effectively use a hand drill to add unique elements and intricate details to your resin art projects, creating visually stunning and personalized pieces.
Only logged in customers who have purchased this product may leave a review.
Related products
-
5 KALI FLOWER MOLD
₹150.00Original price was: ₹150.00.₹99.00Current price is: ₹99.00.


Reviews
There are no reviews yet.